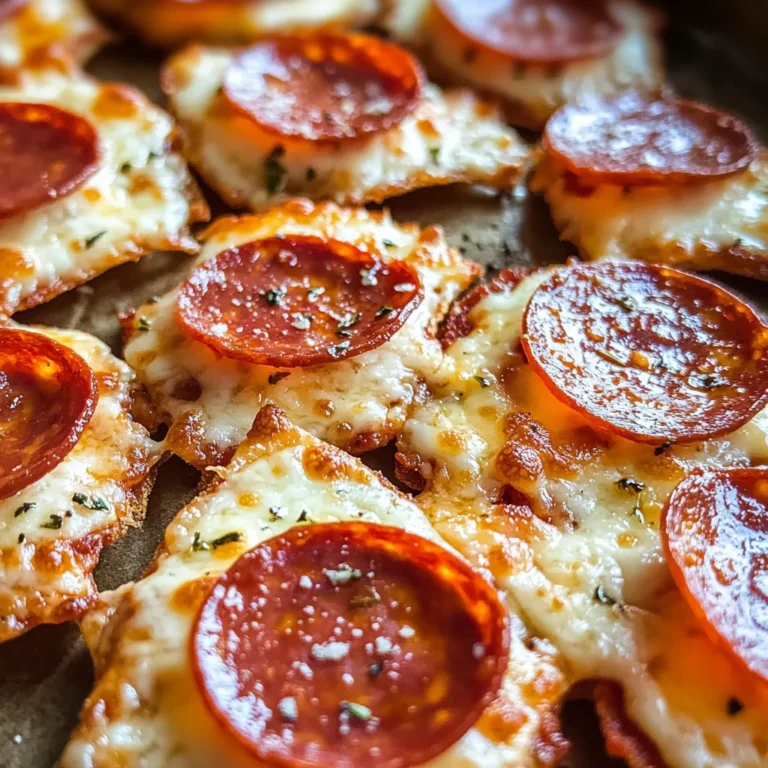
Crispy Cheesy Dill Pickle Chips
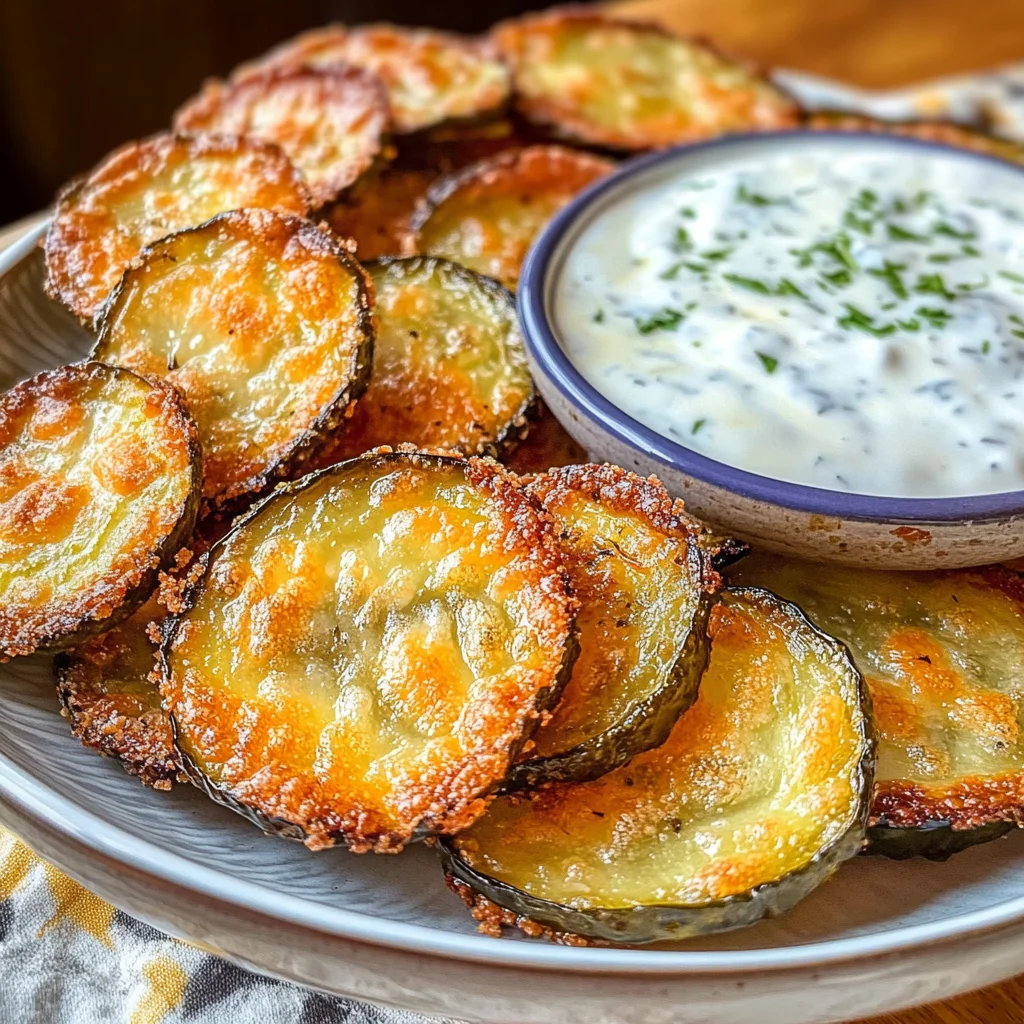
If you’re a fan of crispy snacks, you’ll love these Crispy Cheesy Dill Pickle Chips! They are the perfect blend of cheesy goodness and tangy dill flavor, making them an ideal treat for game day, parties, or just a cozy night in. Easy to make and utterly delicious, they promise to be a hit with family and friends alike.
Why You’ll Love This Recipe
- Quick Preparation: With only 5 minutes of prep time, you can whip up these tasty snacks in no time.
- Flavor Explosion: The combination of melted cheese and dill pickles creates a unique flavor experience that is both savory and satisfying.
- Versatile Snack: These pickle chips can be enjoyed on their own or paired with your favorite dipping sauce for added delight.
- Easy Clean-Up: Using a muffin tin makes portioning simple and keeps mess to a minimum.
- Crowd-Pleaser: Whether at a party or during family movie night, these chips are sure to impress everyone!
Tools and Preparation
Having the right tools makes preparing your Crispy Cheesy Dill Pickle Chips even easier. Here’s what you need:
Essential Tools and Equipment
- Non-stick muffin tin
- Paper towels
- Oven
Importance of Each Tool
- Non-stick muffin tin: This tool allows for easy release of the cheesy pickle chips after baking, ensuring they maintain their shape.
- Paper towels: Patting the dill pickle chips dry prevents excess moisture, which can affect the crispiness of your final snack.
- Oven: A reliable oven is essential for achieving perfectly melted and browned cheese.

Ingredients
To make these delightful Crispy Cheesy Dill Pickle Chips, you will need the following ingredients:
For the Crispy Cheesy Dill Pickle Chips
- 2 cups Shredded Cheese (Colby Jack recommended)
- 24 – 36 Dill Pickle Chips (as needed)
- 1 tbsp. Blackening Seasoning
How to Make Crispy Cheesy Dill Pickle Chips
Step 1: Preheat the Oven
Preheat your oven to 400F. While it heats up, take 24–36 dill pickle chips and pat them dry using paper towels.
Step 2: Prepare the Muffin Tin
Grab a non-stick 12-cup muffin tin. If desired, spray it lightly with non-stick cooking spray. Fill each cup with a generous pinch of shredded cheese.
Step 3: Add Pickles and Seasoning
Top each cheese cup with two or three dill pickle chips. Next, sprinkle your favorite blackening seasoning into each cup. Finally, cover the pickles with more shredded cheese to ensure they are well-coated.
Step 4: Bake the Chips
Place the muffin tin in the preheated oven and bake for about 15 minutes or until the cheese has melted and turned golden brown.
Step 5: Optional Crisping in Air Fryer
For added crispiness, remove each cheesy pickle chip from the muffin tin after baking. Place them in an air fryer at 400F for an additional 5 minutes.
Step 6: Serve and Enjoy!
Serve immediately with your favorite dipping sauce. These crispy treats pair wonderfully with ranch dressing or Tangy Alabama White Sauce!
How to Serve Crispy Cheesy Dill Pickle Chips
Crispy Cheesy Dill Pickle Chips are a delightful treat that can be enjoyed in various ways. Whether you’re hosting a game night or looking for a quick snack, these cheesy bites are sure to impress. Here are some serving suggestions to elevate your snacking experience.
With Dipping Sauces
- Ranch Dip: The cool and creamy flavor of ranch complements the tangy pickles perfectly.
- Tangy Alabama White Sauce: This zesty sauce adds a unique twist that pairs well with the cheese and dill.
- Spicy Sriracha Mayo: A blend of mayonnaise and sriracha gives a spicy kick to balance the flavors.
As an Appetizer
- Party Platter: Arrange your crispy pickle chips on a platter with other finger foods for a fun appetizer spread.
- Garnished with Fresh Herbs: Top your chips with chopped dill or parsley for added freshness and presentation.
In a Sandwich
- Cheesy Dill Pickle Sandwich: Layer crispy chips inside a sandwich for an extra crunch and flavor boost.
- Burger Topping: Add pickle chips to your favorite burger for a cheesy, tangy surprise.
How to Perfect Crispy Cheesy Dill Pickle Chips
To make sure your Crispy Cheesy Dill Pickle Chips turn out perfectly every time, follow these simple tips. They will enhance the flavors and ensure that each chip is as delicious as possible.
- Choose Quality Cheese: Use fresh, high-quality shredded cheese for the best melt and flavor.
- Pat Pickles Dry: Make sure to dry your dill pickle chips thoroughly before baking to achieve maximum crispiness.
- Don’t Overcrowd the Muffin Tin: Leave enough space between each cheese cup so that they bake evenly and get crispy.
- Experiment with Seasonings: Try different seasoning blends to find the perfect flavor combination that suits your taste.
- Air Fry for Extra Crispness: For an even crunchier texture, pop the baked chips in an air fryer for a few minutes after baking.
Best Side Dishes for Crispy Cheesy Dill Pickle Chips
Crispy Cheesy Dill Pickle Chips pair well with various side dishes. Here’s a list of delicious options you can serve alongside them:
- Garden Salad: A fresh salad adds crunch and balances out the richness of the cheesy chips.
- Vegetable Sticks with Hummus: Carrot and celery sticks served with hummus provide a healthy contrast.
- Sweet Potato Fries: The sweetness of sweet potato fries complements the tanginess of dill pickles beautifully.
- Coleslaw: A creamy coleslaw can add texture and flavor diversity to your meal.
- Guacamole and Tortilla Chips: This classic combo brings together creamy avocado and crunchy tortilla chips for a satisfying bite.
- Stuffed Mini Peppers: These colorful bites filled with cheese or beans make for a tasty, vibrant side dish.
Common Mistakes to Avoid
When making Crispy Cheesy Dill Pickle Chips, many people overlook a few key steps that can make or break this delicious snack.
- Skipping the Drying Step: Not patting your dill pickle chips dry can lead to soggy results. Make sure to remove excess moisture for maximum crispiness.
- Overfilling the Muffin Tin: Adding too much cheese or pickles can cause them to overflow during baking. Use a moderate amount to ensure even cooking.
- Ignoring the Cheese Type: Using a cheese that doesn’t melt well can result in disappointing texture. Choose cheeses like Colby Jack that melt beautifully.
- Not Preheating the Oven: Failing to preheat your oven can affect cooking time and texture. Always allow your oven to reach the desired temperature before baking.
- Skipping Optional Air Frying: For an extra crispy finish, don’t skip the air fryer step! It enhances texture but is optional if you prefer it baked only.
Storage & Reheating Instructions
Refrigerator Storage
- Store in an airtight container.
- These pickle chips will stay fresh for up to 3 days in the fridge.
Freezing Crispy Cheesy Dill Pickle Chips
- Place cooled chips in a single layer on a baking sheet.
- Once frozen, transfer them to a freezer-safe bag or container for up to 2 months.
Reheating Crispy Cheesy Dill Pickle Chips
- Oven: Reheat at 350F for about 10 minutes for best results.
- Microwave: Heat for 20-30 seconds, but be aware this may soften them.
- Stovetop: Crisp them up in a pan over medium heat for a few minutes.
Frequently Asked Questions
Here are some common questions about making Crispy Cheesy Dill Pickle Chips.
How To Make Pickle Chips Crispy?
To make pickle chips crispy, ensure they are dried thoroughly before baking and consider using the air fryer after baking.
Can I Use Different Types of Cheese?
Yes! While Colby Jack works great, you can experiment with other melting cheeses like cheddar or mozzarella.
Are Crispy Cheesy Dill Pickle Chips Healthy?
These chips are a fun snack option, but moderation is key. They are lower in carbs than traditional fried snacks.
Can I Customize My Seasoning Blend?
Absolutely! Feel free to add your favorite spices or herbs for different flavor profiles. Experiment with garlic powder or paprika!
What Dipping Sauce Goes Best With These Chips?
They pair wonderfully with ranch dressing or tangy sauces like Alabama White Sauce for added flavor.
Final Thoughts
Crispy Cheesy Dill Pickle Chips are an exciting twist on a classic snack that everyone will love. They’re easy to prepare and offer endless customization options depending on your taste preferences. Try adding different cheeses or spices to create your perfect version!
Crispy Cheesy Dill Pickle Chips
Indulge in the delightful crunch of Crispy Cheesy Dill Pickle Chips, a snack that combines the savory goodness of melted cheese with the tangy bite of dill pickles. Perfect for game day, parties, or a cozy night at home, these easy-to-make chips are guaranteed to impress your family and friends. With just a handful of ingredients and simple steps, you can whip up this tasty treat that’s both satisfying and fun. Whether enjoyed on their own or paired with your favorite dipping sauce, these cheesy snacks will become a go-to in your recipe collection.
- Prep Time: 5 minutes
- Cook Time: 20 minutes
- Total Time: 25 minutes
- Yield: Approximately 4 servings 1x
- Category: Snack
- Method: Baking/Air Frying
- Cuisine: American
Ingredients
- 2 cups Shredded Cheese (Colby Jack recommended)
- 24 – 36 Dill Pickle Chips
- 1 tbsp Blackening Seasoning
Instructions
- Preheat your oven to 400F. Pat the dill pickle chips dry using paper towels.
- Prepare a non-stick muffin tin by adding a generous pinch of shredded cheese into each cup.
- Place two to three dill pickle chips on top of the cheese in each cup, then sprinkle blackening seasoning over them. Finish by adding more shredded cheese to cover.
- Bake in the preheated oven for about 15 minutes until the cheese is melted and golden brown.
- For added crispiness, transfer baked chips to an air fryer set at 400F for an additional 5 minutes.
- Serve immediately with your choice of dipping sauce.
Nutrition
- Serving Size: 6 chips (45g)
- Calories: 180
- Sugar: 1g
- Sodium: 440mg
- Fat: 14g
- Saturated Fat: 9g
- Unsaturated Fat: 4g
- Trans Fat: 0g
- Carbohydrates: 2g
- Fiber: 0g
- Protein: 12g
- Cholesterol: 40mg